How to Clone Your Hard Drive: A Detailed Guide
Cloning your hard drive is a valuable skill, whether you’re upgrading to a larger drive, switching to an SSD, or simply creating a backup. This guide will walk you through the steps to clone your hard drive safely and efficiently.
Why Clone Your Hard Drive?
Cloning a hard drive involves creating an exact copy of your existing drive, including the operating system, applications, and all your files. This process is useful for upgrading to a new drive without losing your data, creating a backup, or migrating to a new computer.
Preparing for the Clone
Choose the Right Cloning Software
There are several cloning software options available, both free and paid. Some popular choices include:
- Acronis True Image: Known for its user-friendly interface and powerful features.
- Clonezilla: A free, open-source option for more advanced users.
- Macrium Reflect: Offers both free and paid versions with robust features.
Choose the software that best suits your needs and install it on your computer.
Backup Your Data
Before you begin the cloning process, it’s crucial to back up your data. While cloning is generally safe, there’s always a risk of something going wrong. Use an external drive or cloud storage to back up your most important files.
Prepare the New Drive
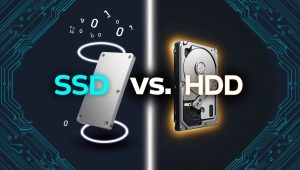
Ensure that the new drive is properly connected to your computer. If you’re using a laptop or desktop with space for only one drive, you may need to use a USB-to-SATA adapter or an external enclosure for the new drive. If you’re upgrading, consider investing in the latest portable SSD technology for faster speeds and better performance.
Check the Drive Size
Make sure the new drive has enough space to accommodate all the data from your old drive. If the new drive is smaller, you’ll need to free up space on the old drive by deleting unnecessary files or moving them to an external storage device.
Step-by-Step Cloning Process
Step 1: Install and Launch the Cloning Software
After installing your chosen cloning software, launch it on your computer. Most software will guide you through the process with a wizard, making it easy to follow.
Step 2: Select the Source and Destination Drives
In the cloning software, select your current hard drive as the source drive. Then, select the new drive as the destination. Double-check that you’ve chosen the correct drives to avoid accidental data loss.
Step 3: Choose Cloning Options
Many cloning tools offer different cloning methods, such as:
- Sector-by-Sector Clone: Copies every sector of the old drive, including empty sectors. This option is slower but ensures an exact replica.
- Intelligent Clone: Copies only the used sectors, which is faster and more efficient.
Choose the option that best suits your needs. For most users, the intelligent clone is sufficient.
Step 4: Start the Cloning Process
Once you’ve configured the settings, start the cloning process. Depending on the size of the drive and the method chosen, this process can take anywhere from a few minutes to several hours. Be patient and avoid interrupting the process.
Step 5: Verify the Clone
After the cloning process is complete, shut down your computer and disconnect the old drive. Boot up your computer with the new drive. If everything went smoothly, your system should boot normally, and all your data should be intact.
Troubleshooting Common Cloning Issues
Cloning Process Fails
If the cloning process fails, check the following:
- Ensure that both drives are properly connected.
- Make sure the new drive has enough space.
- Try using a different cloning software.
System Won’t Boot from the New Drive
If your system won’t boot from the new drive:
- Double-check the boot order in your BIOS settings to ensure the new drive is set as the primary boot device.
- If you’re cloning to an SSD, make sure AHCI mode is enabled in the BIOS.
Missing or Corrupted Files
If you notice missing or corrupted files after cloning:
- Try running a disk check or repair tool on the new drive.
- Restore missing files from your backup if necessary.
- Use data recovery software to recover lost data.
Post-Cloning Tasks
Optimize the New Drive
If you’ve cloned to an SSD, make sure to optimize the drive settings for SSD performance. Disable disk defragmentation and enable TRIM to maintain optimal speed and longevity.
Safely Dispose of the Old Drive
If you no longer need the old drive, make sure to securely erase all data before disposing of it. This ensures that your personal information remains protected.
Regular Backups
Now that you’ve successfully cloned your drive, consider setting up regular backups to protect your data. Cloning is a great way to create a one-time backup, but regular backups are essential for ongoing data protection.
Conclusion
Cloning your hard drive is a straightforward process that can save you time and effort when upgrading or backing up your system. By following this detailed guide, you can ensure a smooth and successful cloning experience.



Post Comment